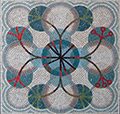

A mosaic jig is an indented tray for laying out whole mosaic tiles. You lay out a design, stick a sheet of glued paper to the flat, finished face, turn the jig over (sandwiching it with a board) and there it is once the sheet has dried, ready to lay. Of course, if the repeat or design is larger than a single jig, it can be a bit more complicated — but that’s it, in essence. Here you can see a mosaic that’s been made with a jig for circular tiles. It’s an example of something more complex in nature. Keeping track of a larger or non-repeating design isn’t easy once you have started to turn the sheets over as the tiles becomes reversed. It requires a logical mind, or good record keeping. A friend took the photo of this mosaic for me — I believe it’s from the Paris Metro, and I am sorry that I don’t know who the artist is.
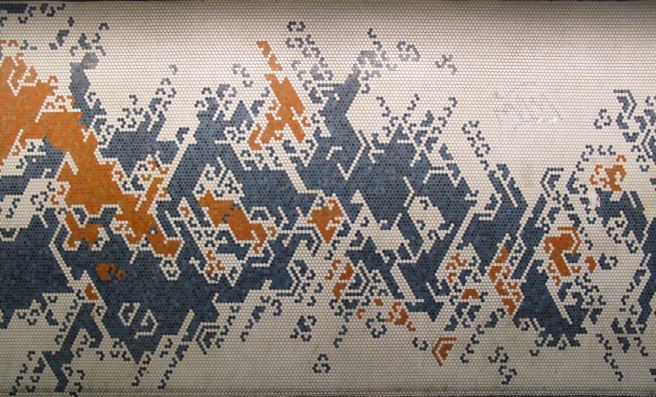
Although jigs, as they were here, are sometimes used for unglazed ceramic, they are more frequently used for glass. In the 60s, you’d often see random mixes of colours as a decorative facing to a building — the kind you can still find outside what used to be coffee bars, or shops that long ago wanted to seem a bit modern and maybe to suggest contemporary Italian style. There were some of these in London’s Holloway Road when the workshop was there, and we used to look at the mixes with longing and wish the colours were still available. Old colours were not only thicker with lovely, wavering edges instead of the more regular moulded ones you see today. They also had a certain quality of internal depth of colour. I don’t mean transparency, I mean the colour didn’t have the glossy, reflective character of today’s glass tiles, but had depth, as if you were looking into the body of the colour itself, rather than at the surface of it.
Although they were made of glass, these old tiles were matt, rather than either shiny or sandy looking (by ‘sandy’ I mean pitted with the small white dots that today’s vitreous tiles often have). This spotty appearance does I think, come from the sand content (or rather the silica — that derives from sand) of the glass. I would love to know more about the production process of vitreous tiles, and would be pleased to hear from anyone who could explain some of its mysteries. What I think I know is that vitreous material, as opposed to smalti, is made from a mixture of silica, alumina and oxides. After the turn of the millenium, new vitreous tiles started to come onto the market from China and these new tiles had a number of distinct characteristics. They were either very sandy (in the UK you could buy the sandy ones in ready made mixes from Topps Tiles, or other DIY outlets — sheeted up for your bathroom walls) or they were very brittle. Sometimes they were both.
For me, these new materials made teaching unexpectedly tricky. The new colours extended the available range in an exciting way, but were a nightmare if you had to cut them. They had a tendency to explode in your hand as you applied pressure with the nippers. Some of the Chinese ones also were highly indented, with deep ridges on the back. These were great if you wanted to cut at 90 degrees to the ridges, but a nightmare if you wanted anything else. The ridges somehow dictated how the tiles broke, and introduced a new set of physical laws of cutting.
The jigs are interesting objects in themselves. I will post photos of them later in the week.